Overview
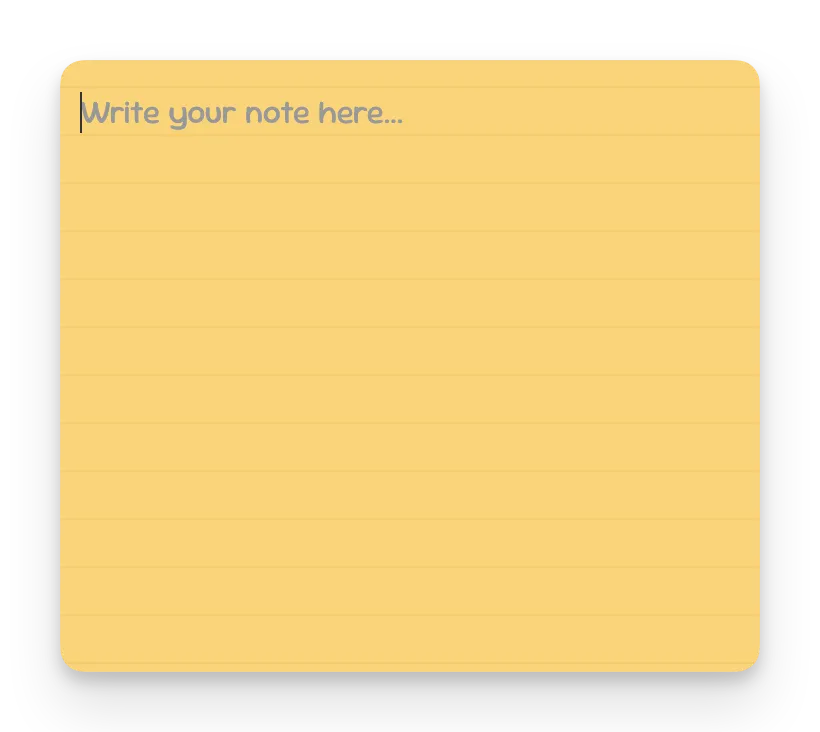
Create the user-facing interface for TabNotes - a sticky note-styled popup where users write and edit notes. This lesson covers popup HTML structure, CSS styling with custom fonts, and JavaScript event handling for capturing user input.
By the end, you’ll have a functional note-taking interface (though notes won’t persist yet - that’s Lesson 6).
What You’ll Learn
- Structure popup HTML in WXT projects
- Import and apply CSS styling with hot reloading
- Use Google Fonts for custom typography
- Handle textarea input events with TypeScript
- Debug popup UI with Chrome DevTools
- Understand popup lifecycle and limitations
Popup Architecture in WXT
WXT treats popups like mini web applications. The entrypoints/popup/ directory contains:
index.html- Popup structuremain.ts- JavaScript logicstyle.css- Styling
Unlike background scripts, popup scripts don’t use definePopup() - they’re standard HTML pages with JavaScript modules.
Creating the HTML Structure
Replace entrypoints/popup/index.html with the note-taking interface:
<!-- entrypoints/popup/index.html -->
<!DOCTYPE html>
<html>
<head>
  <meta charset="utf-8">
  <title>TabNotes</title>
</head>
<body>
  <div id="app"></div>
  <script type="module" src="./main.ts"></script>
</body>
</html>
Key Points:
<script type="module">enables ES6 importssrc="./main.ts"- TypeScript files work directly (WXT compiles automatically)- Empty
#appcontainer - we’ll populate via JavaScript
Building the Note Interface
Create entrypoints/popup/main.ts to inject the textarea:
// entrypoints/popup/main.ts
document.querySelector<HTMLDivElement>('#app')!.innerHTML = `
  <div class="sticky-note">
    <form class="note-form">
      <textarea
        id="note-text"
        placeholder="Write your note here..."
      ></textarea>
    </form>
  </div>
`;
TypeScript Details:
querySelector<HTMLDivElement>- Type annotation for better IntelliSense!- Non-null assertion (we know#appexists in our HTML)- Template literal for multi-line HTML
Testing: Open the extension popup - you’ll see an unstyled textarea.
Styling the Sticky Note Popup
Create entrypoints/popup/style.css and import it in main.ts:
// entrypoints/popup/main.ts
import './style.css';  // Vite automatically processes this

document.querySelector<HTMLDivElement>('#app')!.innerHTML = `
  // ... HTML from above
`;
Adding Google Fonts
Import custom typography from Google Fonts at the top of style.css:
/* entrypoints/popup/style.css */
@import url('https://fonts.googleapis.com/css2?family=Sour+Gummy:wght@400;700&display=swap');
Finding Fonts:
- Visit fonts.google.com
- Filter by “Handwriting” category
- Select font → Get font → Get embed code → Choose
@import
Complete Sticky Note Styling
/* entrypoints/popup/style.css */
@import url('https://fonts.googleapis.com/css2?family=Sour+Gummy:wght@400;700&display=swap');

body {
  margin: 0;
  padding: 0;
  background-color: #f9d379;
  min-width: 350px;
  min-height: 400px;
  height: 100vh;
  overflow: hidden;
}

#app {
  width: 100%;
  height: 100vh;
  display: flex;
  flex-direction: column;
}

.sticky-note {
  background-color: #f9d379;
  /* Lined paper effect using gradient */
  background-image:
    linear-gradient(to bottom,
      transparent 0px,
      transparent 22px,
      #f3cb69 22px,
      #f3cb69 23px,
      transparent 23px
    );
  background-size: 100% 24px;
  background-position: 0 40px;
  padding: 40px 20px;
  height: 100%;
  box-sizing: border-box;
}

.note-form {
  height: 100%;
}

textarea {
  width: 100%;
  height: 100%;
  background: transparent;
  border: none;
  outline: none;
  resize: none;
  font-family: 'Sour Gummy', cursive;
  font-size: 16px;
  line-height: 24px;  /* Aligns with background lines */
  color: #333;
  padding: 0;
}

textarea::placeholder {
  color: #999;
}
CSS Technique Breakdown
Lined Paper Effect:
background-image: linear-gradient(
  to bottom,
  transparent 22px,      /* Gap */
  #f3cb69 22px,          /* Line start */
  #f3cb69 23px,          /* Line end (1px thick) */
  transparent 23px       /* Next gap */
);
background-size: 100% 24px;  /* Repeat every 24px */
This creates horizontal lines at 24px intervals, matching the textarea’s line-height: 24px so text aligns perfectly with lines.
Transparent Textarea:
background: transparent;
border: none;
outline: none;
Makes textarea invisible so the lined background shows through.
Hot Reload in Action
With the dev server running (bun dev), try changing CSS:
body {
  background-color: orange;  /* Test hot reload */
}
Save the file - the popup instantly updates without manual reload. This is Vite’s hot module replacement in action.
Revert to #f9d379 (sticky note yellow) when done testing.
Capturing User Input
Detect when users type in the textarea using event listeners:
// entrypoints/popup/main.ts
import './style.css';

document.querySelector<HTMLDivElement>('#app')!.innerHTML = `
  <div class="sticky-note">
    <form class="note-form">
      <textarea
        id="note-text"
        placeholder="Write your note here..."
      ></textarea>
    </form>
  </div>
`;

// Get textarea element
const noteText = document.querySelector<HTMLTextAreaElement>('#note-text')!;

// Listen for keyup events
noteText.addEventListener('keyup', () => {
  console.log('Note content:', noteText.value);
});
TypeScript Typing:
HTMLTextAreaElement- Specific element type (not genericElement)- Provides autocomplete for textarea-specific properties like
.value
Testing:
- Open popup
- Right-click → Inspect to open DevTools
- Type in textarea
- Console logs each keystroke’s full text content
Debugging Popup UI
Opening DevTools for Popups
Unlike background scripts, popup DevTools open like normal webpages:
- Open extension popup (keep it open)
- Right-click anywhere in popup
- Select Inspect
DevTools URL shows: chrome-extension://[extension-id]/popup/index.html
Inspecting Elements
In Elements tab:
- View the DOM structure you created via
innerHTML - Inspect applied CSS styles
- Modify styles live to test changes
In Console tab:
- View
console.log()output - Test JavaScript in context of popup
- Access DOM (e.g.,
document.querySelector('#note-text'))
Understanding Popup Lifecycle
Critical Limitation: Popups are not persistent.
What Happens on Close
- User clicks outside popup → Popup closes
- DOM is destroyed
- JavaScript execution stops
- All in-memory data is lost
Testing This Behavior
- Open popup, type “Test note”
- Console shows “Note content: Test note”
- Click outside popup to close it
- Reopen popup
- Textarea is empty - the note is gone
This is why storage is essential - popups can’t remember state between sessions.
Form Handling Best Practices
Preventing Form Submission
Our form doesn’t need to submit (no server-side processing):
// Optional: Prevent default form behavior
const form = document.querySelector<HTMLFormElement>('.note-form')!;
form.addEventListener('submit', (e) => {
  e.preventDefault();
  // Note saving happens on keyup, not submit
});
We’ll handle saving via storage API in Lesson 6, not form submission.
Why keyup Instead of change?
keyup Event:
- Fires on every keystroke
- Enables auto-save behavior
- Better UX for note-taking
change Event:
- Only fires when textarea loses focus
- Would require users to click away to save
- Less responsive
Styling Considerations
Popup Size
body {
  min-width: 350px;
  min-height: 400px;
}
Why set minimum dimensions?
- Popups can render at arbitrary sizes
- Ensures consistent experience
- Prevents awkwardly small windows
Browser Limits:
- Chrome: Max ~800x600px for popups
- Firefox: Max ~800x600px for popups
- Mobile browsers: Different constraints
Font Loading
@import url('https://fonts.googleapis.com/css2?family=Sour+Gummy:wght@400;700&display=swap');Potential Issue: Requires internet connection to load font.
Offline Alternative: Bundle font files in public/fonts/ and reference locally:
@font-face {
  font-family: 'Sour Gummy';
  src: url('/fonts/SourGummy-Regular.woff2') format('woff2');
}
For simplicity, this course uses Google Fonts.
What’s Next
You’ve built a functional note-taking popup with custom styling and input detection. The interface works, but notes vanish when the popup closes.
Lesson 6 introduces the chrome.storage API to persist notes across sessions. We’ll save notes as users type and load them when the popup reopens - making TabNotes actually useful.